
An article on restoring data from a backup has already appeared on our blog, but after the release of the new version of JetBackup – which we now use on our servers – we created a guide on how to restore data in the new version.
Thanks to the JetBackup software, you can restore files, databases or e-mails on your own. It’s a very convenient and fast method. In this tutorial you will learn how to restore a single file as well as the entire directory. Before we start, however, the first thing you need to do is log in to your cPanel account.
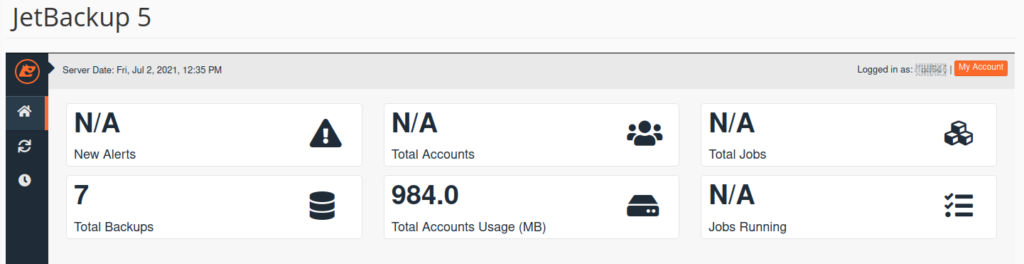
Table of Contents:
- Setting the email address for notifications
- Restoring files and folders
- Restoring a database
- Restoring e-mails
- Restoration queue
1. Setting the email address for notifications
The first thing we recommend is setting your e-mail address, so you will receive notifications about the progress of the backup being restored.
After clicking on “My Account” next to the username, you will see the following view:
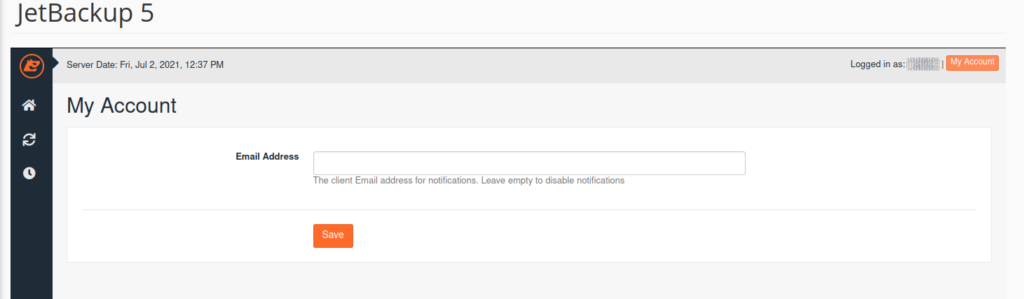
Most likely there will be an empty field – enter your e-mail address to which you want to receive notifications. After saving the changes, the following message should appear: “Success”.
2. Restoring files and directories
Select “JetBackup 5” on the cPanel home screen. The available backups that can be restored will appear on the screen.
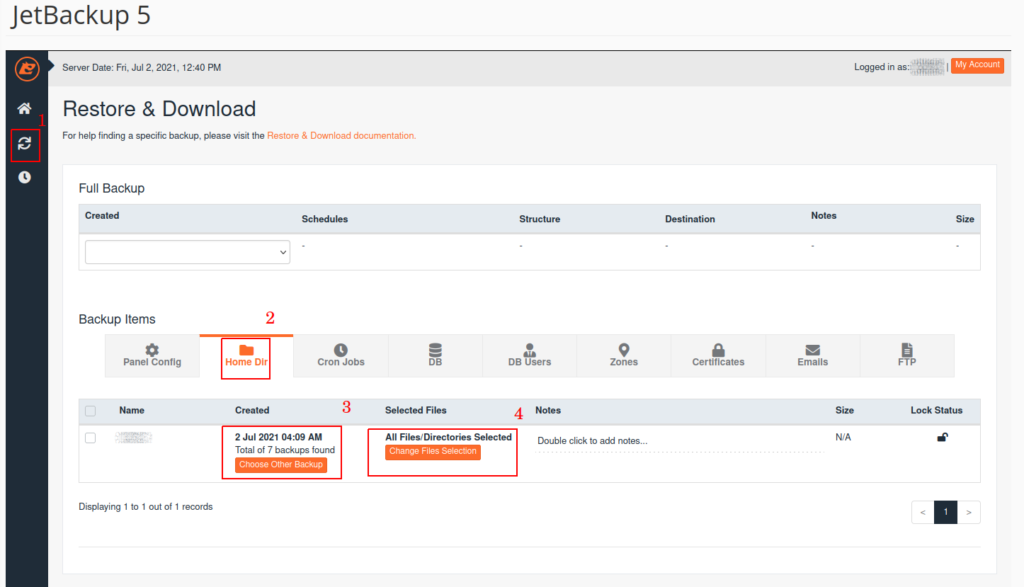
To start the file restoration process, click on the arrows on the left side of the screen (1). The operation is simple and intuitive. To restore files, click “Home Dir” (2).
Then you can select the date from which the backup will be restored (3) and what files / directories are to be restored (4).
In our example, we’re going to restore the entire “Presta17” directory by simply selecting it as shown below.
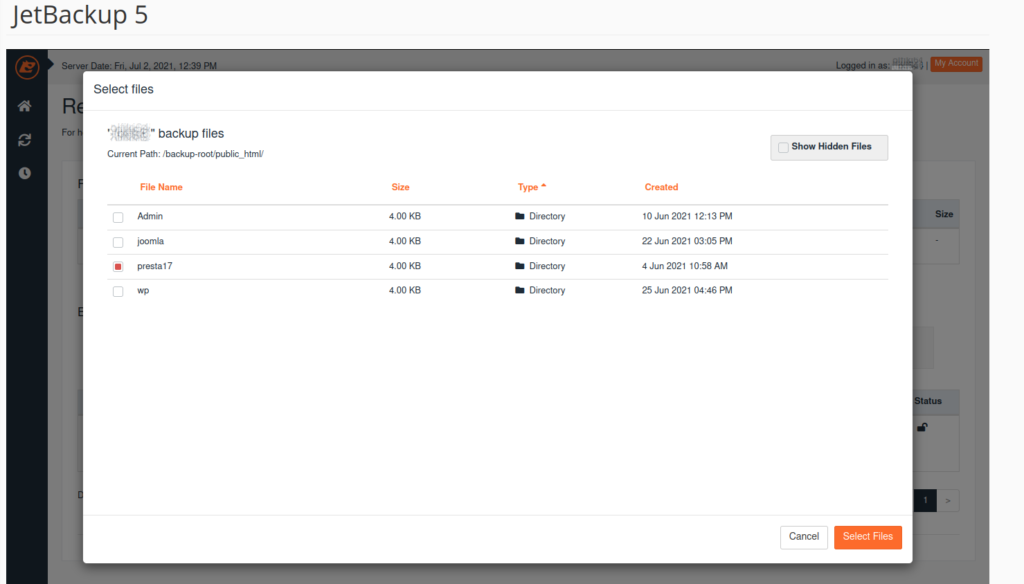
After selecting the directory click on the “Select Files” button.
With the files and date of the backup already specified, you can select the backup on the list and click “Restore”.
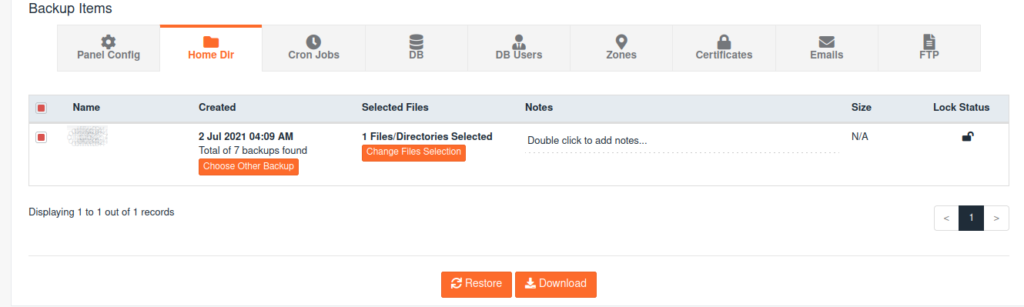
You will then be prompted whether to start the restore or abort. Click the “Restore Selected Items” button to add the restores to the queue.
Then you can go back to the Queue by clicking by the clock icon and check if the files have already been restored.
3. Restoring a database
As with files, you can also restore or download the database. You can do this by going to “DB” instead of “Home DIR” as before.
Find the database that you want to restore and select the date from which it will be restored. Select it on the left and proceed as when restoring files.
In addition to restoring the database, you must also restore the user selected in “DB Users”. Restore it in the same way as before.
4. Restoring e-mails
When you want to restore your e-mail account, enter JetBackup 5 as in the previous steps.
Click on “Emails” and all of the e-mail accounts will be displayed. You can change the date from which the mailbox is restored.
After finding the e-mail account and selecting the date, you can restore this account, just like in the previous steps.
Please note that e-mails received after the backup date will be lost after the restoration.
5.Restoration queue
All items that you requested to restore (files, directories, databases, etc.) are queued and restored one by one.
The queue function will allow you to view the current operations that are being performed and those that have already been completed.
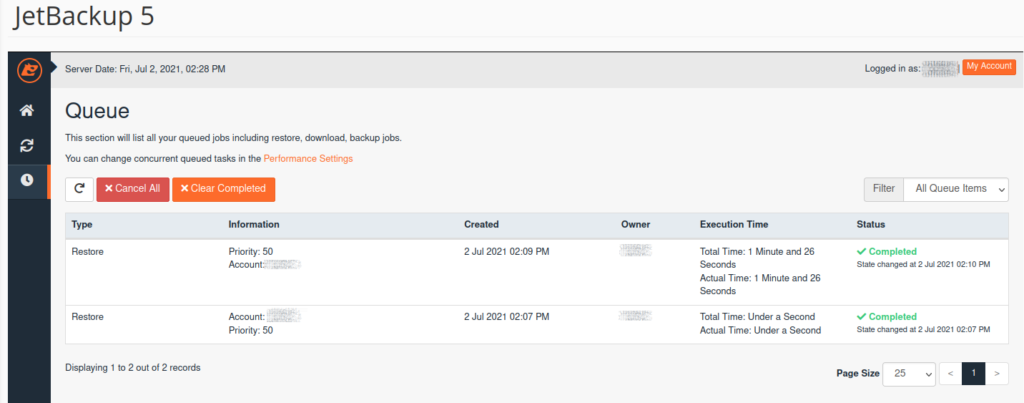
Operations already performed have a green inscription “Completed”, while operations in progress have a progress bar and in this case you should wait.
Depending on the size of the backup that is being restored, such restoration may take from a few seconds to several dozen minutes.

The article is prepared jointly by a group of people from the Smarthost Administrators.
- A direct connection between Smarthost and Cloudflare - October 2, 2024
- Why is Redis better than Memcached? - September 16, 2024
- What is DMARC and why should you have it? - July 12, 2023