
How to move WordPress from local computer to remote server?
We assume that you have already purchased hosting with cPanel management panel.
If you are faced with choosing a performance-proven hosting, compare our packages.
All descriptions in this guide are based on the Smarthost hosting
To transfer a WordPress installed locally on your computer to a remote server, you must first install WordPress on the server (see our guide Step by Step – WordPress Installation).
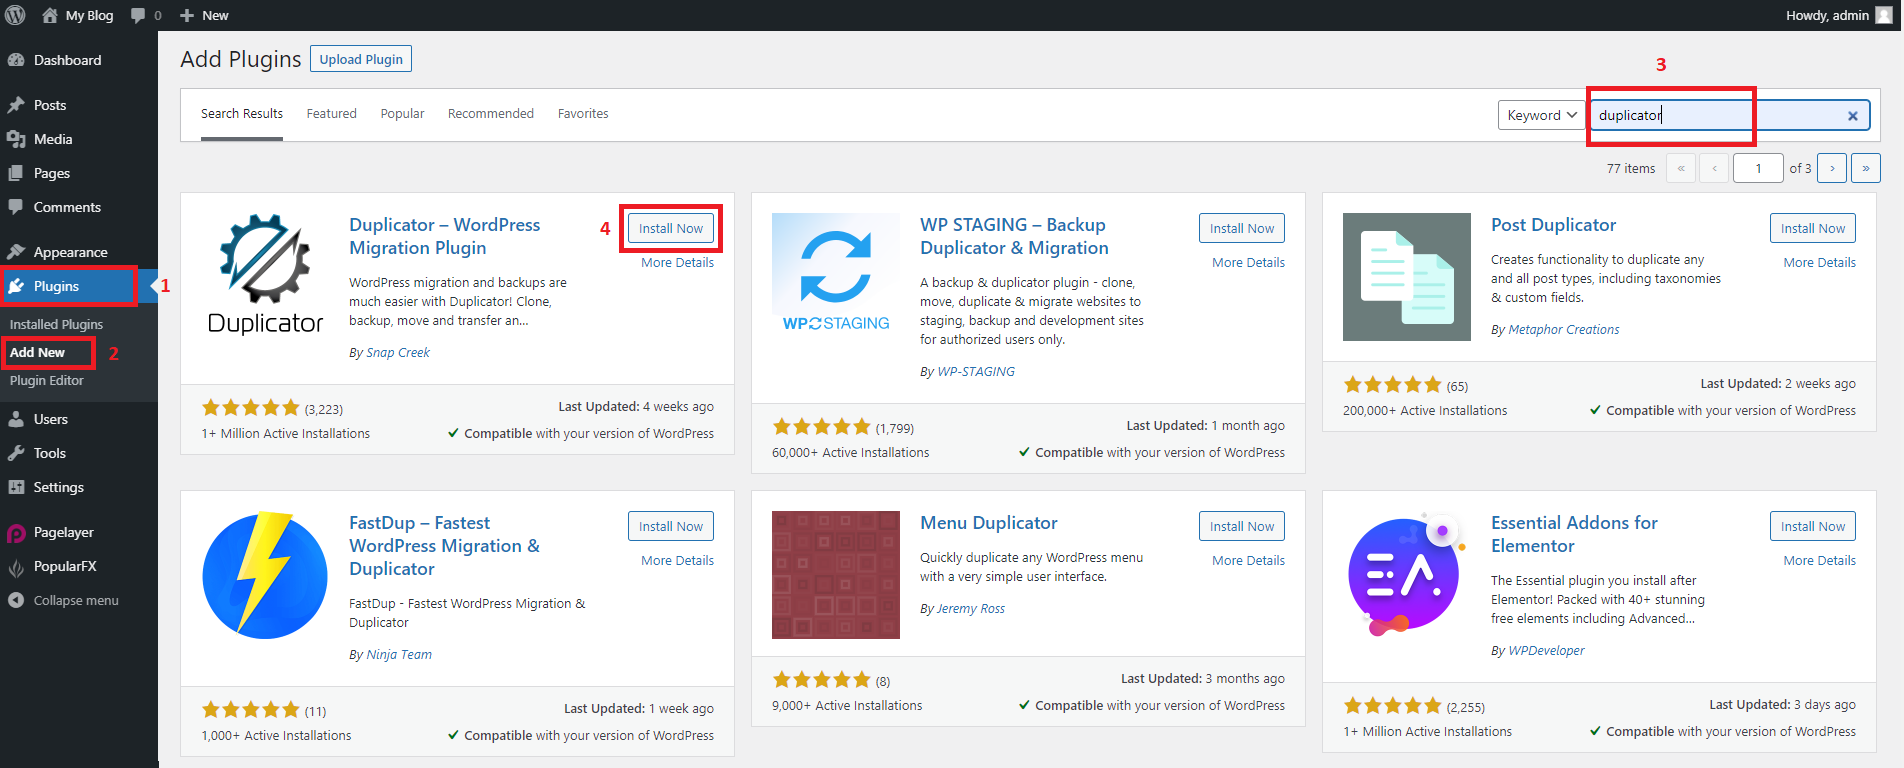
Then, after logging into the WordPress administration panel, click the “Plugins” button (field 1), and then the “Add new” button (field 2).
In the “Search plugins” field (field 3), enter “duplicator”. It is a plugin for WordPress that will allow you to transfer our website from your computer to the server. After searching, click the “Install” button (field 4).
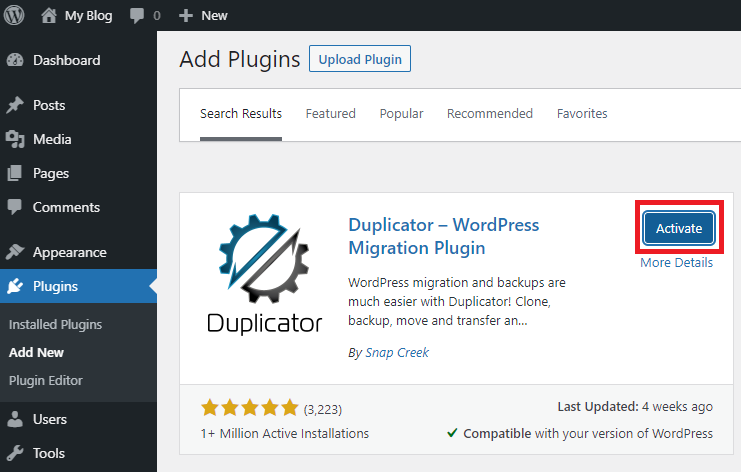
After the installation is completed, click on “Activate”. We perform the entire process both on the WordPress installed on the server and on the one installed locally on the computer.
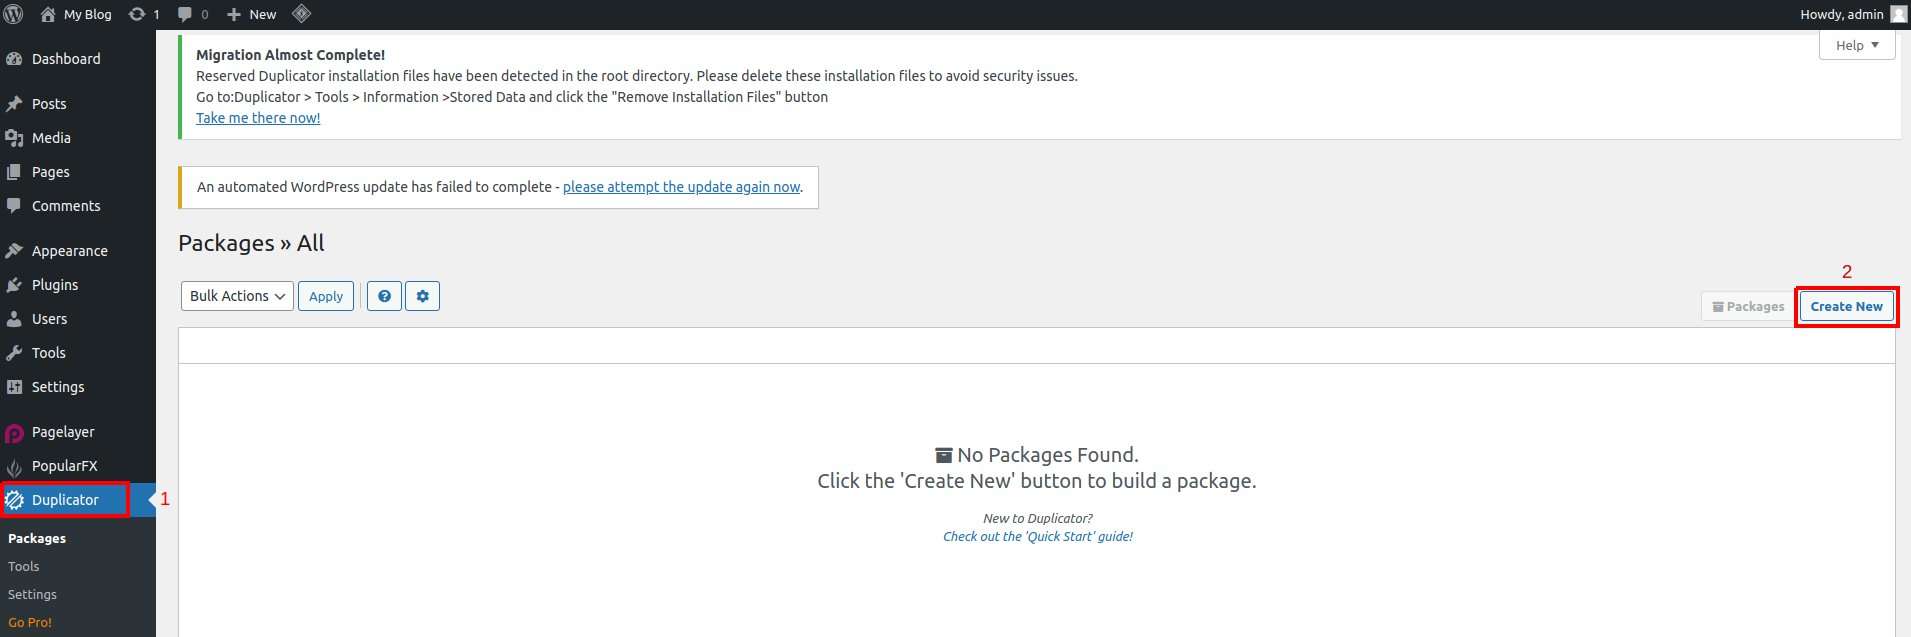
Being logged in to the locally installed WordPress administration panel, click the newly created “Duplicator” button (field 1), and then “Create new” (field 2). This will open the package wizard allowing you to transfer our website to the server.
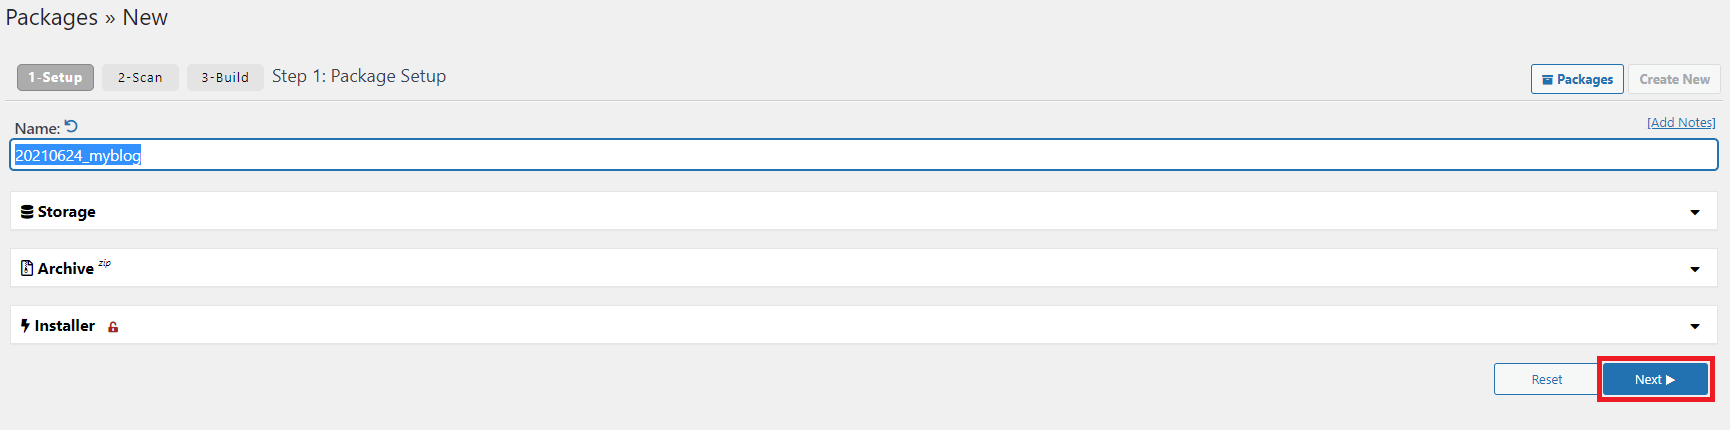
In the next step, click the “Next” button.
Then click on the “Build” button.
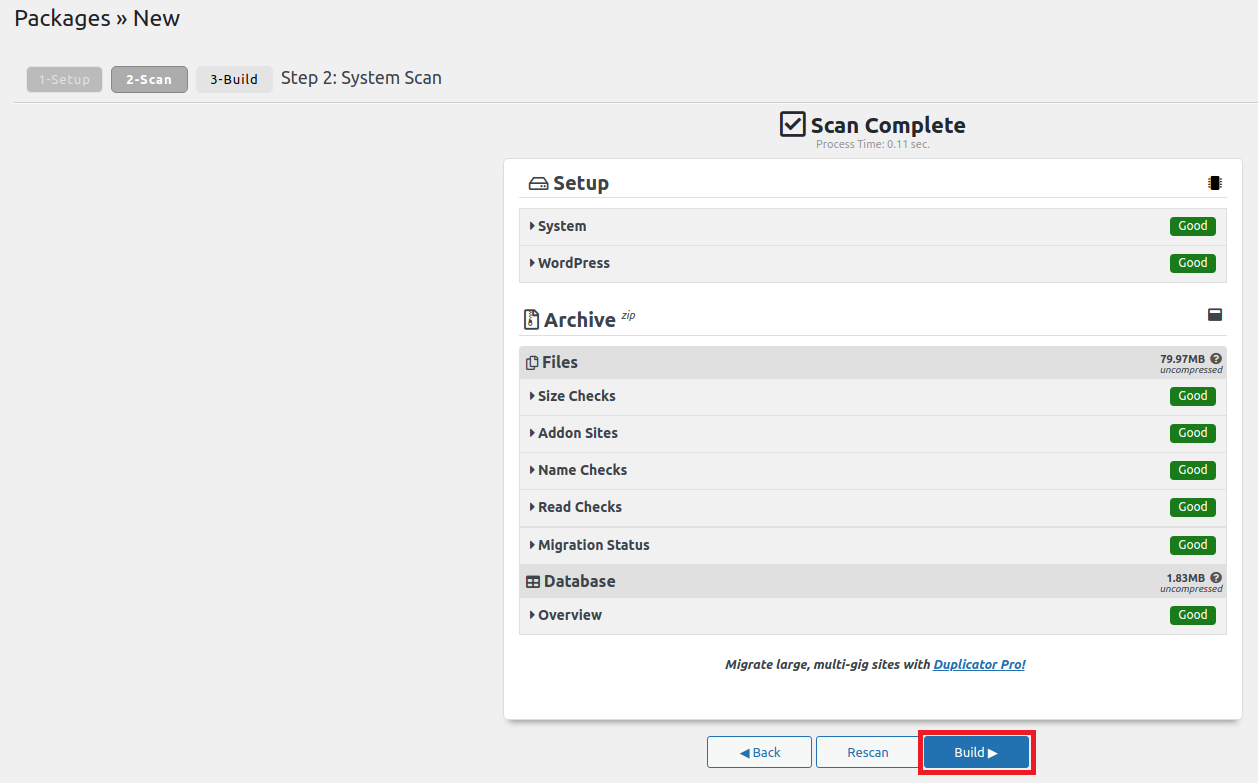
After completing the process, click the “Installer” button to download the “Installer.php” file.
Then on the “Archive” button to download the archive file. Both files are necessary to transfer our site
Then we will have to transfer the files we have downloaded to the server.
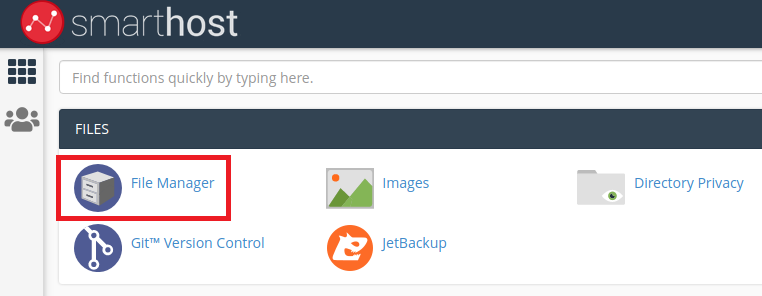
Log in to the cPanel panel of our website on the server (example: www.customer-domain.eu/cpanel) and click the “File manager” button.
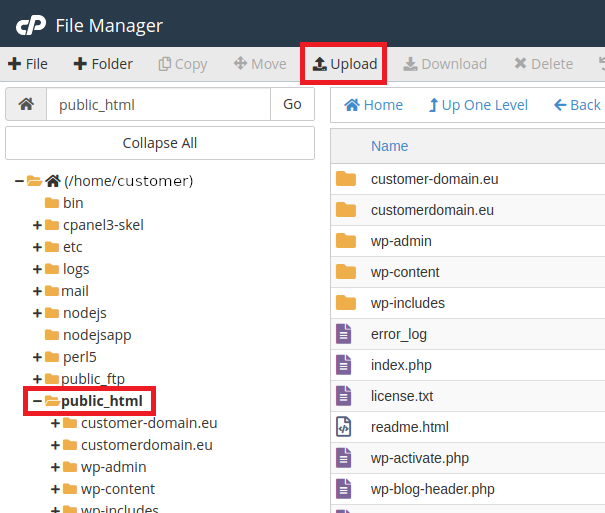
In the file manager, click “public_html” to go to the folder, then click the “Upload” button.
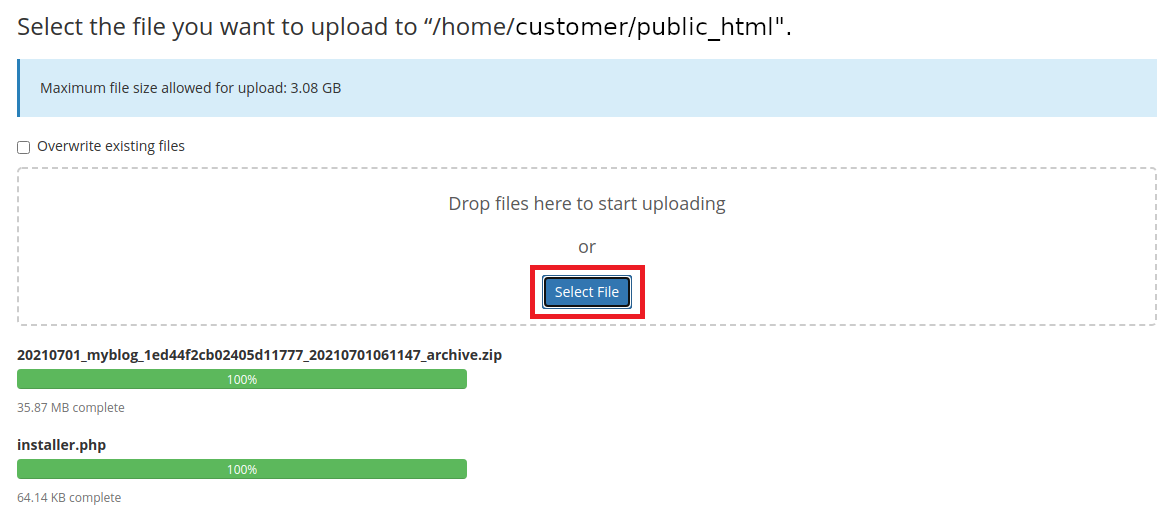
Click the “Select file” button and in the newly opened window go to the place where we saved our “installer.php” file and the archive.
We select each of these files to put on the server.
After successfully placing the files on the server, enter the address of our website in the web browser, adding “installer.php” at the end (example: www.customer-domain.eu/installer.php).
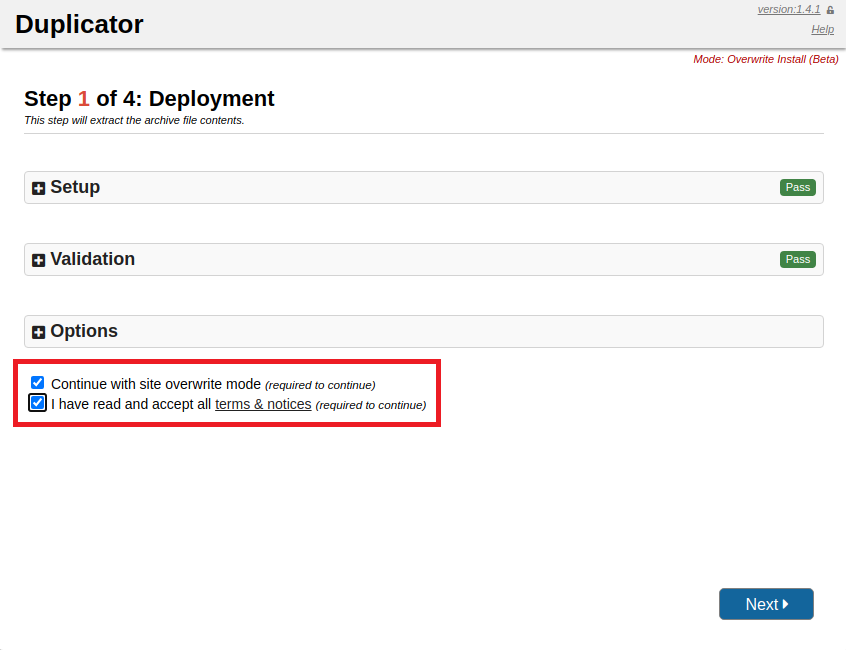
This will open the page for installing our files from the local version of WordPress.
We mark two checkboxes and click “Next”
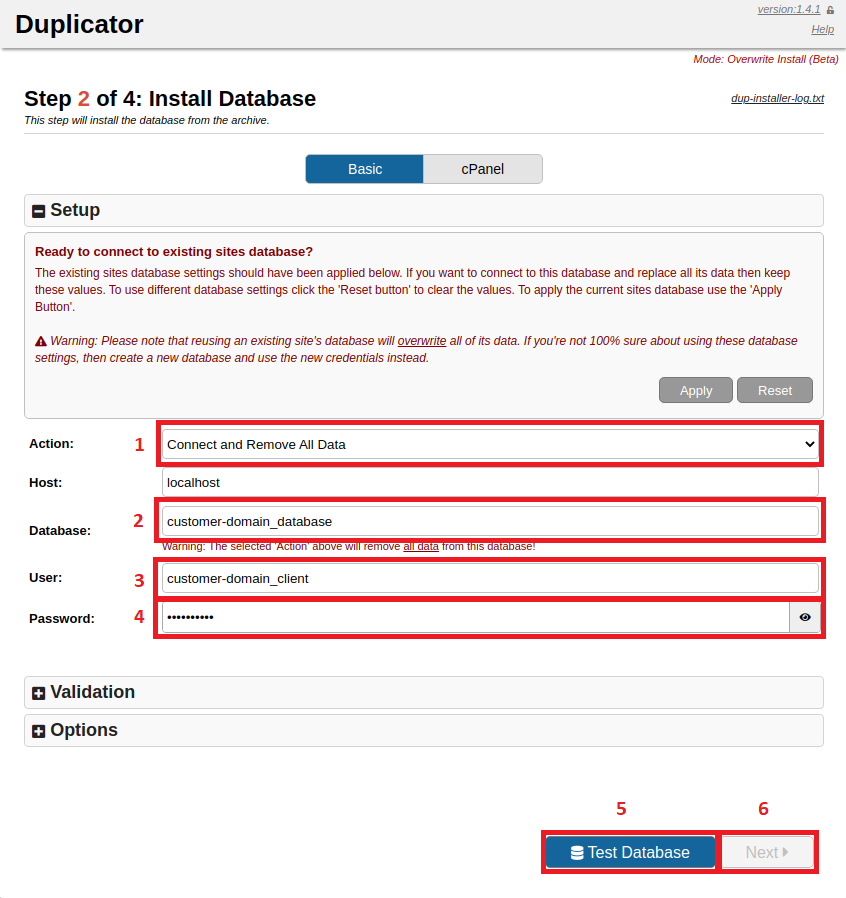
First, select “Connect and Remove All Data” (field 1), so that the database content from the local version of WordPress will be uploaded to the server to the existing database (this will delete all the content of the database that exists on the server).
In the “Name” field (field 2) enter the name of the database that exists on the server (example :customer-domain_database).
In the “User” field (field 3), enter the name of the user assigned to the database (example: customer-domain_client).
In the “Password” field (field 4) enter the password of the database user.
Now click “Test Database” to perform a database connection test(field 5), and then click the “Next” button (field 6).
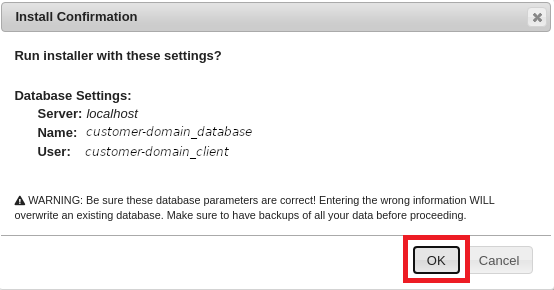
A window will appear with another warning asking you to check the correctness of the data, and click the “OK” button.
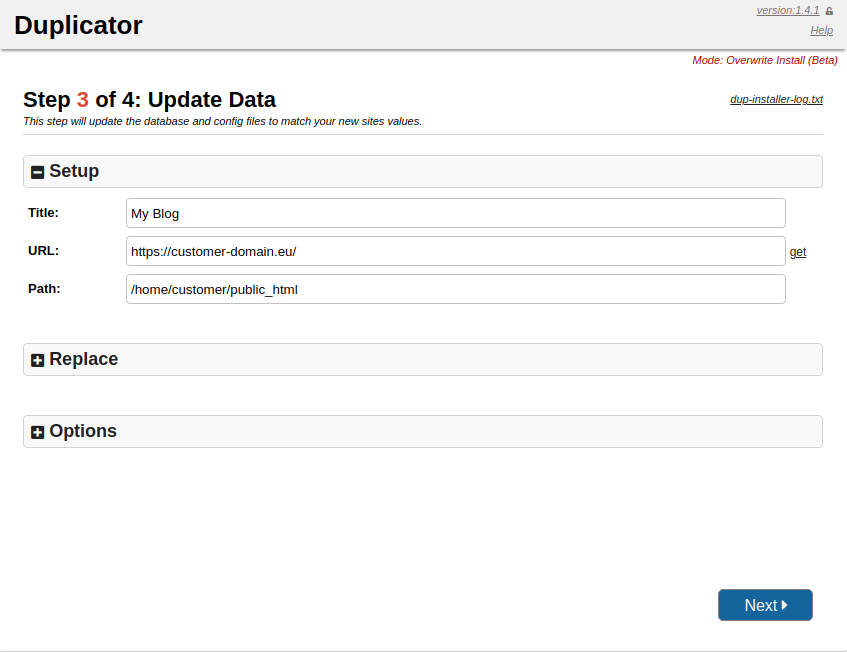
In the next step, we set new settings for our website and click “Next”
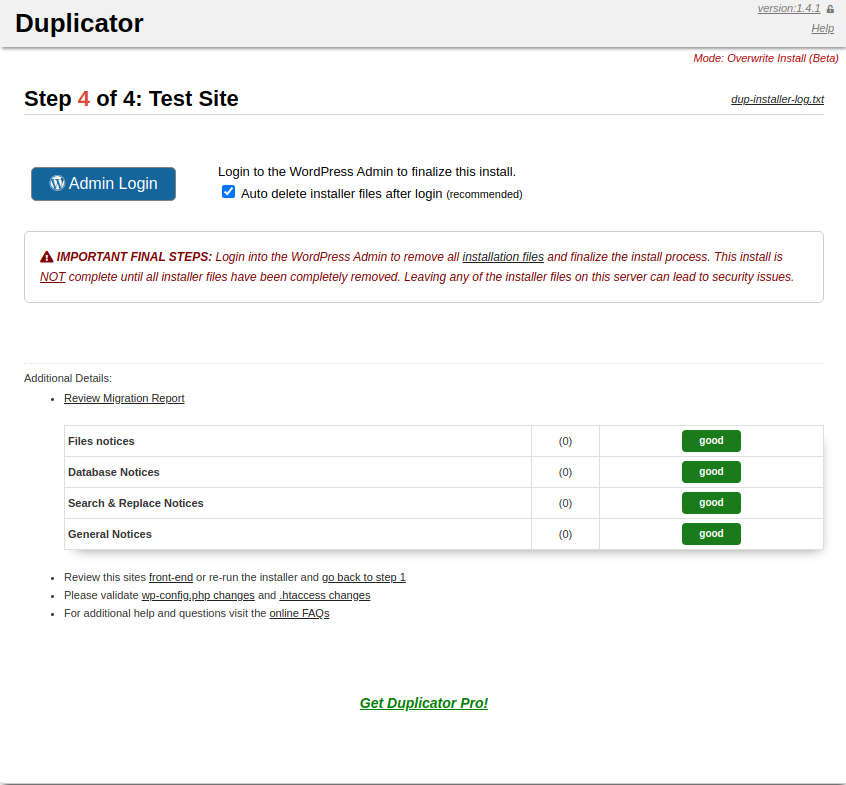
If we have done all the steps correctly, we should see a screen confirming the installation. It also allows you to check if it works properly and remove installation files.
From that moment on, our site made locally is on the server and is available under our domain.
To log in to the WordPress administration panel, enter the address of our website and add “/ wp-login” or “/ wp-admin” (example: www.customer-domain.eu/wp-admin).
The login and password are the same as in the local version of our website.
Create a free test account on the Smarthost.eu server and check how correctly transferred WordPress from computer to server works.
Create a test account with the premium-ssd-www package

- Creating a CRON Job in the Task Scheduler - December 6, 2023
- Enabling SSL certificate in Joomla - July 14, 2023
- Installing PrestaShop – step by step - July 14, 2023