To run your own online store, you must first download PrestaShop to our computer.
The PrestaShop installer can be found at: www.prestashop.com/en

The downloaded file will have a .zip extension.
Transferring PrestaShop files to the server
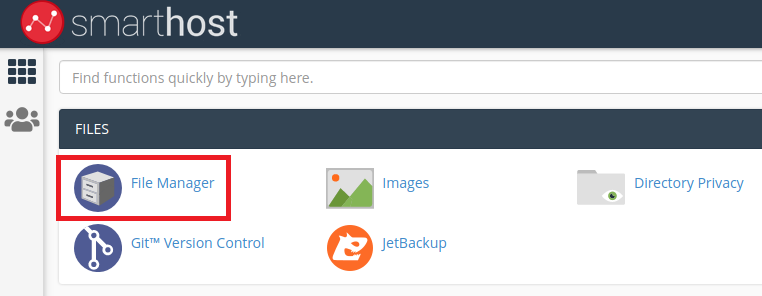
After downloading the .zip file, log in to cPanel via the address www.customer-domain.eu/cpanel, where we change the “customer-domain” to our domain name.
Then click the “File Manager” button.
After loading the manager, click “Upload” and select the previously downloaded PrestaShop file with the .zip extension.
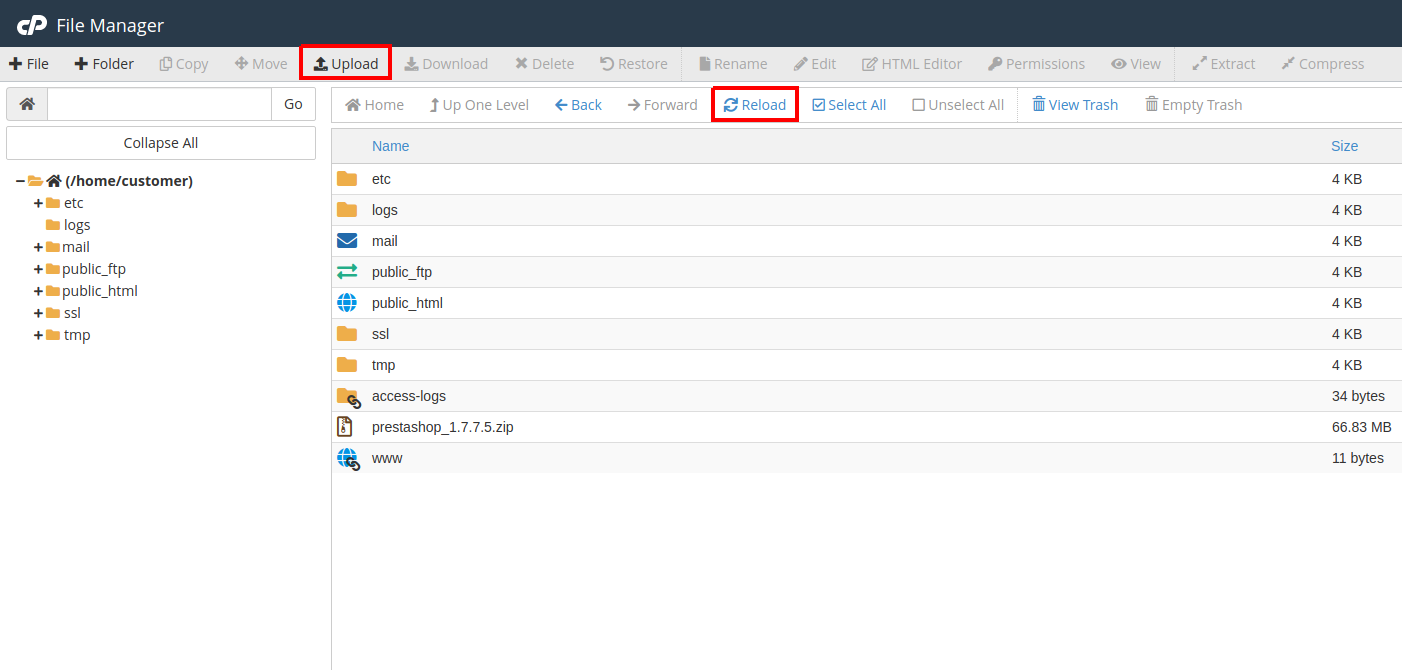
The file will be uploaded to the server, but in order to view it, we need to select the “Reload” option. The file will appear in the root directory.
The next step is to extract the files. To do this, click on the file we uploaded to the server (with the .zip extension) and click on the “Extract” button. A new window will appear. Now, we need to specify the folder where our files should be located.
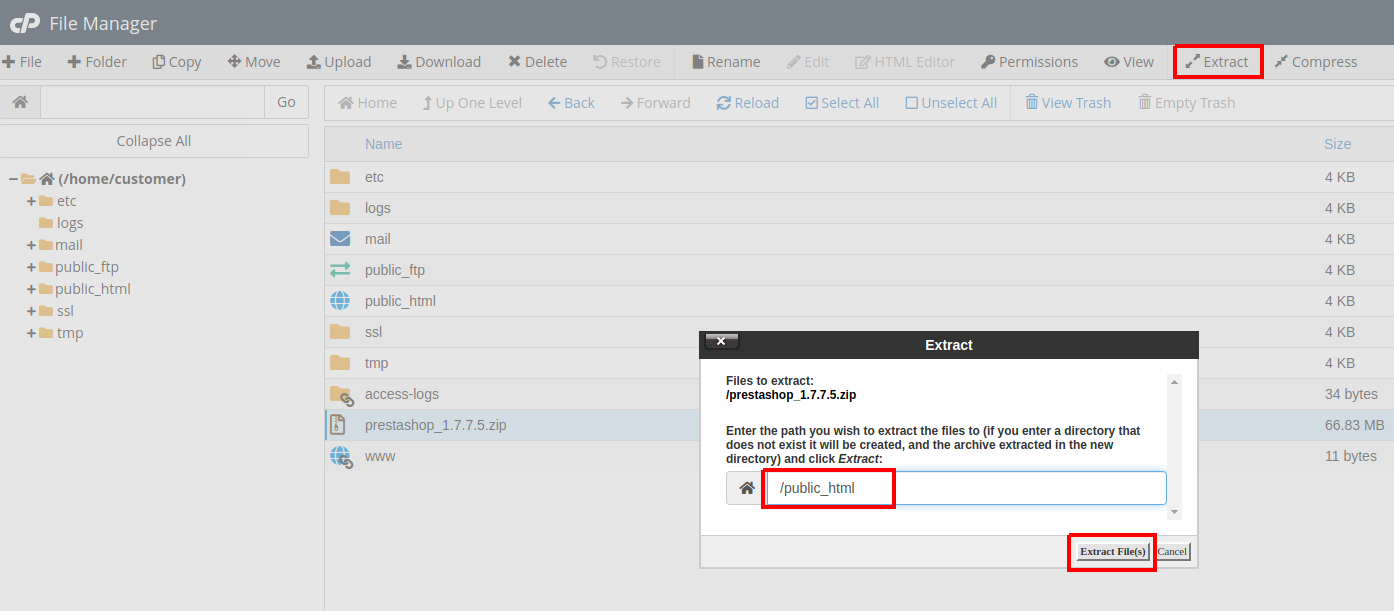
To ensure that the store functions correctly, we need to select the “public_html” directory and click on “Extract File(s).”
If an additional domain in which we want to have a shop has already been added to the account, we must enter its directory name after “public_html /”.
When finished, click “Close” and go to the PrestaShop installation.
Installing PrestaShop
Through the browser, we enter the address of our website www.customer-domain.eu (where, of course, we change the “customer-domain” to the name of our domain).
If all the files have been uploaded correctly, we should see the loading page.
Once the page is loaded, we can begin the installation.
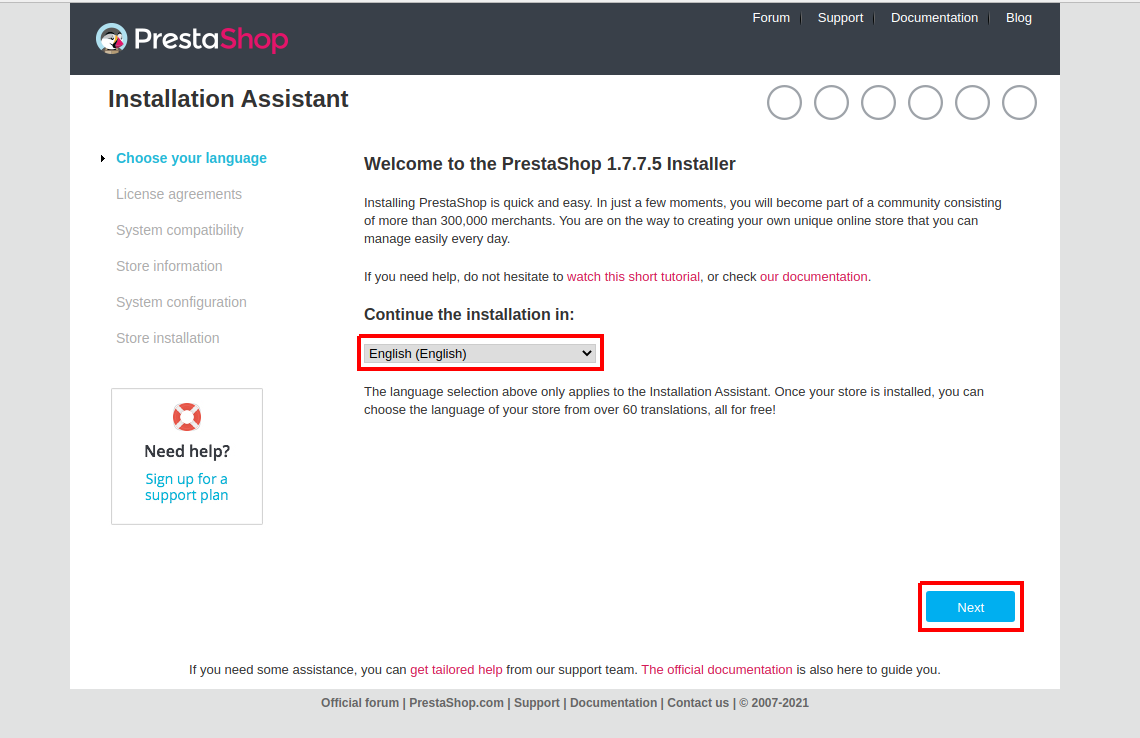
In the first step, select the language to be used and click “Next”.
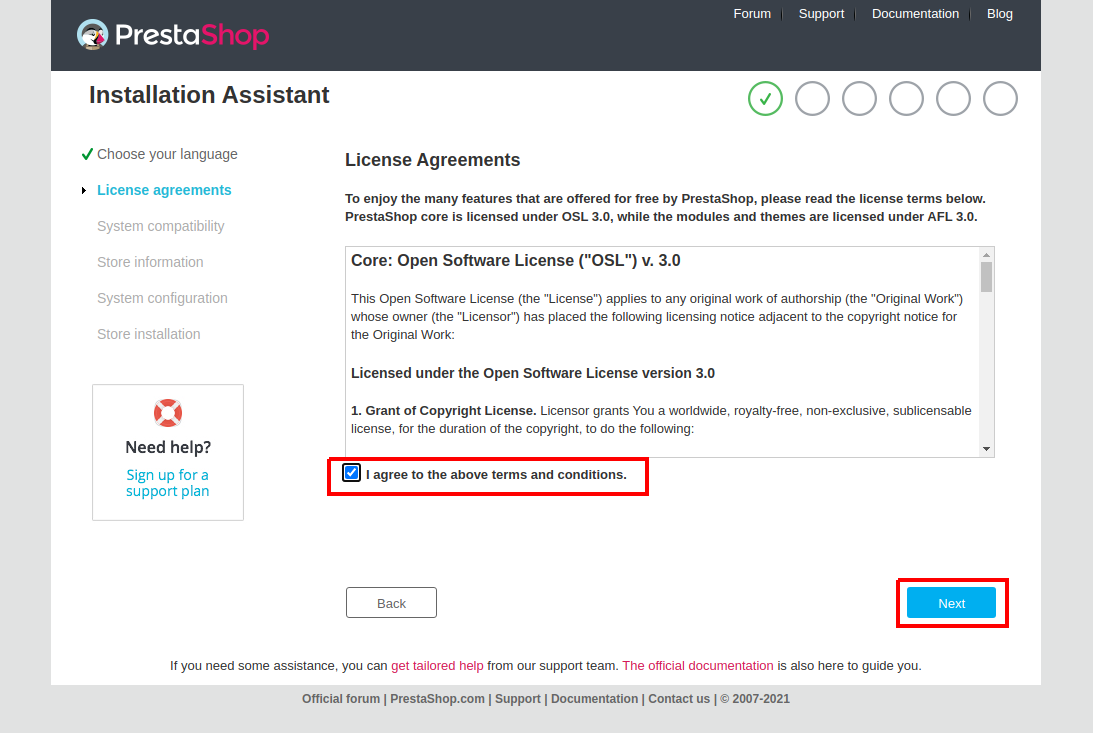
Then we read, accept the license and click “Next”.
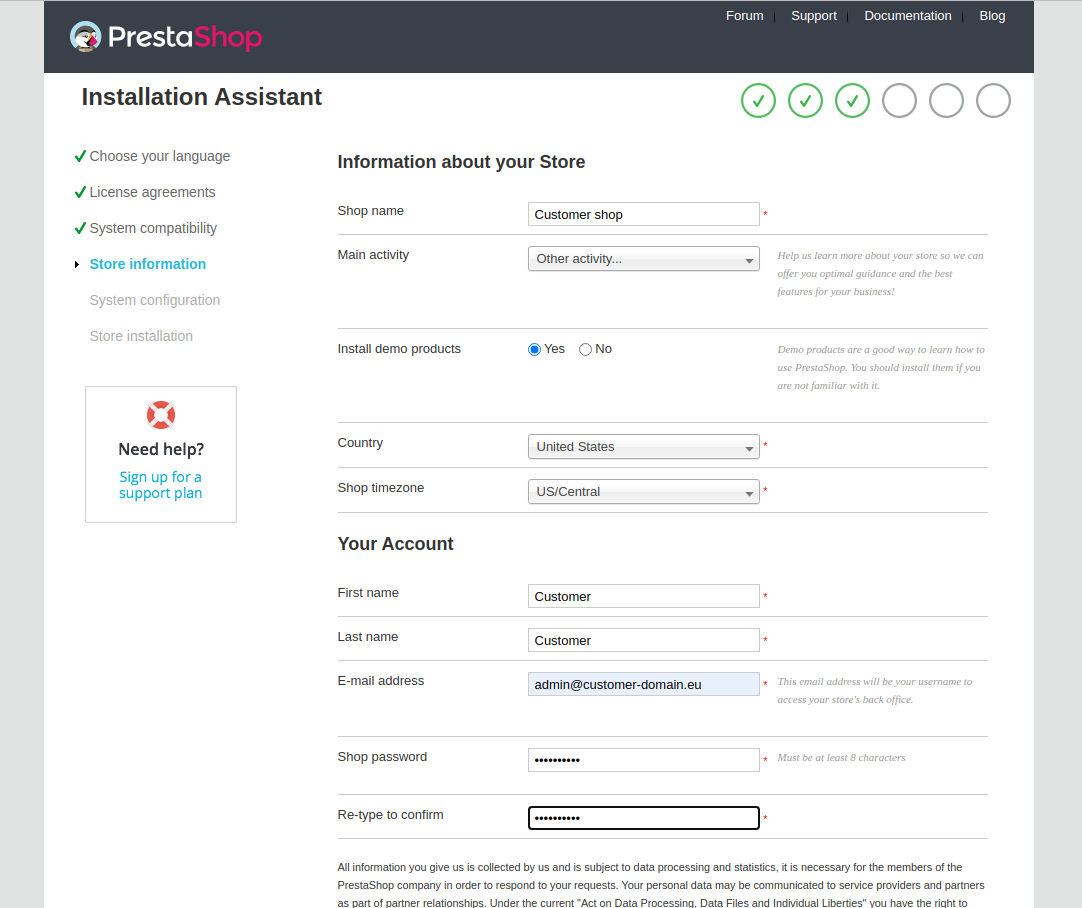
Time to complete the information about our store. The installer needs information such as:
Shop name
Main activity
Country
First Name
Last Name
E-mail address
Password and its confirmation.
In version 1.7.8.8, there is also an option available during installation called “Enable SSL” (SSL can also be enabled after installation). Enabling SSL configures the online store with the SSL protocol, increasing its security and brand trust.
We provide this information and click “Next”.
After completing the information about our store, two options will be displayed:
“Install sample products”:
This option installs sample products, categories, and other elements of the online store that come bundled with the software. The purpose of this option is to allow the store administrator to quickly and easily test the platform’s functionality without the need to manually add products. Installing sample products enables you to see how the online store will look. However, if you prefer to start with an empty store, you can skip this option.
“Install modules”:
This option allows you to install additional features and extensions available in PrestaShop as modules. Modules are additional components that can be easily installed to customize the online store according to your needs. They can provide various functionalities such as adding new payment methods or integrating with other services. During the installation, you don’t have to install all the modules. You can select “Choose modules to install” and select the ones that interest you.
After going further, we complete the information about the database. A guide on how to create a database is available on our website
Database server address: 127.0.0.1 or localhost
Database name: The name of our database
Database User: The username
Database password: The password
Prefix of tables: Leave unchanged, i.e .: ps_
To be sure, we check the connection using the “Test database connection” button.
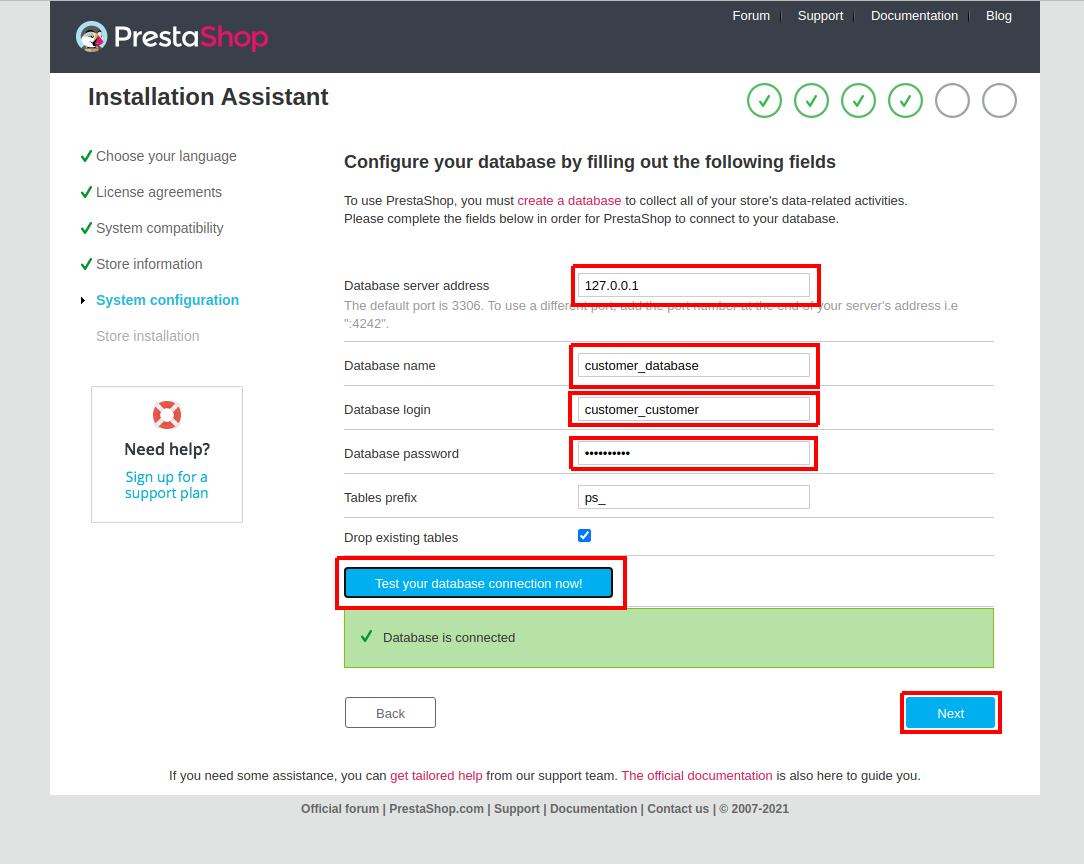
If all the data has been entered correctly, a green message about connecting to the database will be displayed.
Click “Next”.
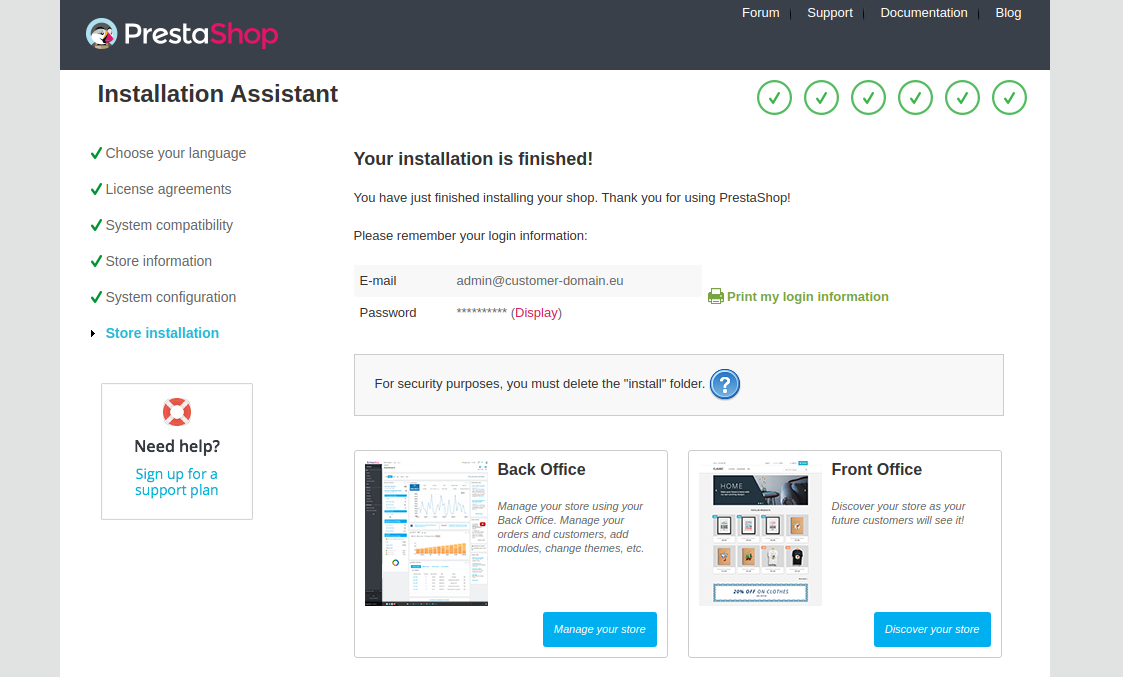
The store has been configured and the installer proceeds to install the entire system.

Our store is almost ready for use. According to the information from the installer, for security reasons, we should delete the “Install” folder.
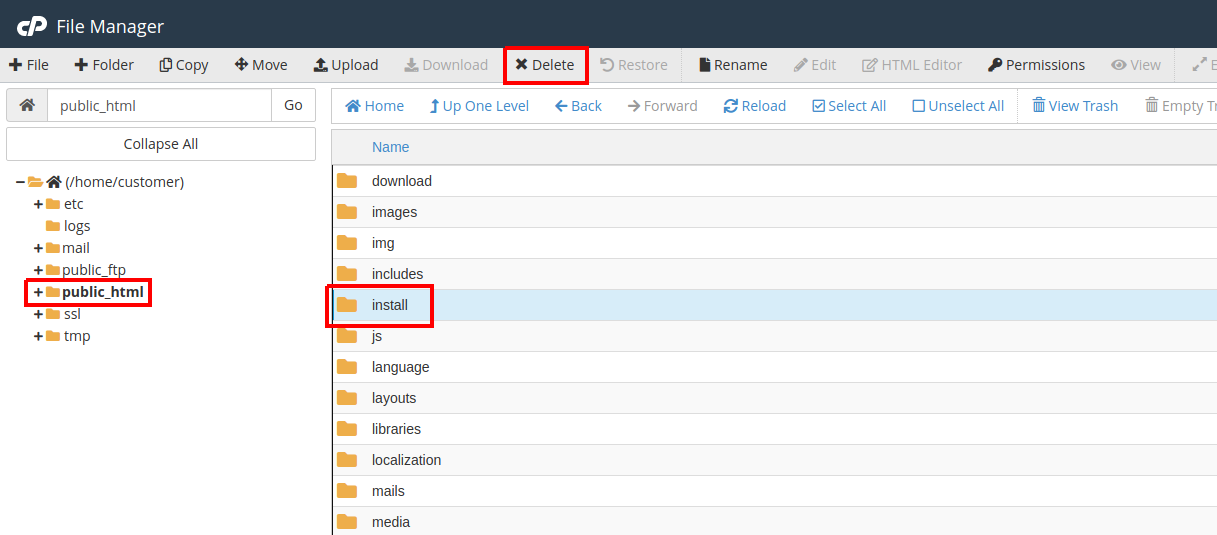
To do this, go to cPanel -> File manager. Go to the “public_html” directory, find the “install” folder and remove it using the “Delete” option
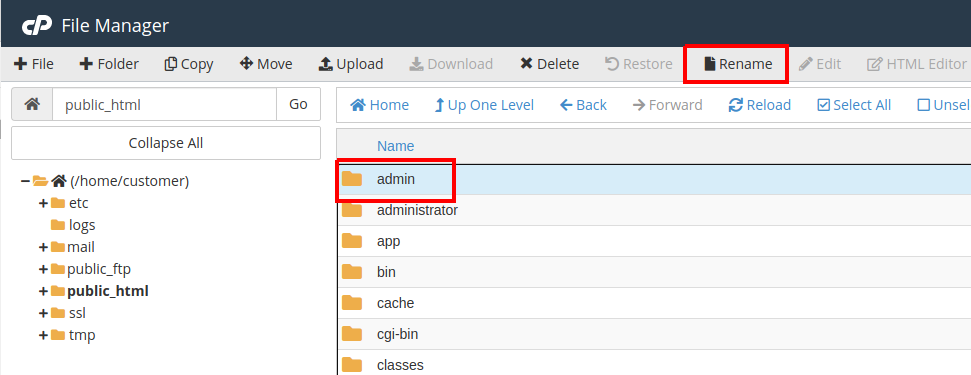
We have one last thing to do. Namely, renaming the “admin” directory so that we can log in comfortably. Also using the “File Manager” we search for the “admin” folder and change its name to the one we choose.
To log in to the back-end of the store (i.e. to the place where we can manage it) in the browser, go to the address of the directory whose name we have just changed. Ie:
www.customer-domain.eu/admin123 (where “customer-domain” is the name of your domain, and “admin123” is the name of the directory)
In this way, we created our online store quickly and easily. Now all we have to do is adjust it to our own needs, add products and start the adventure with online sales.

- Creating a CRON Job in the Task Scheduler - December 6, 2023
- Enabling SSL certificate in Joomla - July 14, 2023
- Installing PrestaShop – step by step - July 14, 2023